Author

Clare Louise

Browsing

Key Takeaways

  • Flexible office layouts allow businesses to adapt to changing staff numbers and work styles without major structural changes.
  • Integrating smart technology during the initial design phase reduces long-term operational costs and improves employee efficiency.
  • Choosing sustainable materials and energy-efficient lighting supports corporate social responsibility goals and creates a healthier work environment.
  • A well-planned renovation helps maintain staff morale by providing diverse zones for both focused work and social interaction.

Introduction

The way we work is changing faster than many office buildings can keep up with. Have you ever walked into a workspace and felt like you were stepping back twenty years? It is a common feeling when businesses grow, but their physical environment remains static. Future-proofing is not about predicting the future with a crystal ball. Instead, it is about building flexibility into the very bones of your workspace. By partnering with an experienced commercial interior design company in Singapore, you can create a space that evolves alongside your business objectives rather than hindering them.

Embracing Modular and Flexible Layouts

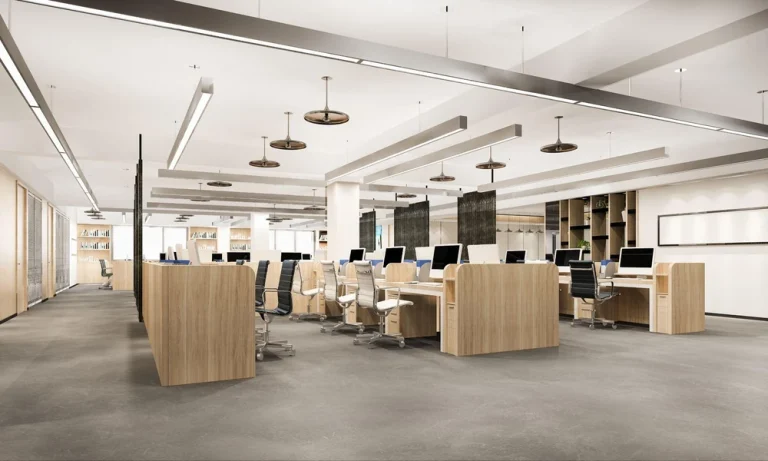
Gone are the days when heavy, fixed mahogany desks were the standard for professional environments. Today, the most successful offices rely on modularity. Think about it: why should you be stuck with a floor plan that only works for your current headcount? A reputable office renovation company will often suggest furniture systems that can be reconfigured in a single afternoon. This approach allows you to expand or contract departments without needing to tear down walls or call in contractors every six months.

Beyond just moving desks, flexibility extends to how rooms are used throughout the working day. A boardroom might serve as a training centre in the morning and a yoga studio in the evening. This multipurpose approach ensures that every square foot of expensive Singapore real estate is working hard for you. When you design with movement in mind, you create a dynamic atmosphere where employees feel empowered to choose the setting that best suits their specific tasks, whether that is a quiet pod or a communal bench.

Integrating Smart Technology Seamlessly

Technology should be a silent partner in the office, not a source of constant frustration with tangled wires and incompatible plugs. When you work with a commercial interior design company, they look at how data and power flow through the space. They ensure that power points are exactly where they need to be and that high-speed connectivity is consistent in every corner. Have you considered how much time is wasted looking for a meeting room? Smart booking systems and integrated sensors can solve these minor headaches before they start.

Moreover, smart lighting and climate control systems are no longer just luxury additions. They are essential for managing rising energy costs and improving comfort. Modern systems can sense when a room is empty and dim the lights or adjust the air conditioning accordingly. This level of automation does more than save money; it shows your team that the company values a modern, efficient way of operating. It creates a seamless experience where the environment responds to the people inside it, rather than forcing people to adapt to the limitations of the building.

Prioritising Employee Well-being and Comfort

It is no secret that a happy team is a productive team. But how does interior design influence happiness? It starts with basic human needs like natural light and clean air. Designers now focus on biophilic elements, which is just a fancy way of saying they bring the outdoors in. Adding greenery or ensuring that desks have a view of the window can significantly lower stress levels. You know what? Simple changes like improved acoustics can be the difference between a focused afternoon and a day spent battling distractions.

Comfort also means providing variety. Some people thrive in a buzzy, social atmosphere, while others need total silence to crunch numbers. An office renovation company can help you strike this balance by creating “zones.” These might include library-style quiet areas, casual breakout lounges, or even standing desks to encourage movement. By providing these options, you show your staff that you respect their individual work styles. This investment in the human element of the workplace pays off through higher retention and a more vibrant company culture.

Sustainable Choices for Longevity

Sustainability is a word that gets thrown around a lot, but in the context of office design, it means choosing quality over fast trends. Future-proofing involves selecting materials that are durable and easy to maintain. Why buy cheap carpets that will look tatty in two years when you can invest in high-quality, recycled tiles that last a decade? A commercial interior design company can guide you toward eco-friendly suppliers who offer products that are both stylish and environmentally responsible.

Furthermore, a sustainable office avoids waste during the renovation process. By reusing certain structural elements or repurposing existing furniture, you can reduce the carbon footprint of your project. This isn’t just about being “green”; it is about making sensible financial decisions. Materials that are free from volatile organic compounds (VOCs) also ensure that the air quality remains high, which reduces sick days and keeps everyone feeling sharp. When your office is built to last, you spend less time worrying about repairs and more time focusing on your core business.

Conclusion

Investing in a modern workspace is a strategic move that affects your bottom line and your brand reputation. Whether you are expanding your team or simply refreshing an outdated look, the right environment acts as a catalyst for growth. It is about creating a home for your company culture to flourish. If you are ready to see how your physical space can better support your goals, reach out to the experts. Contact us at Ampersand Associates to begin your journey toward a more efficient, engaging, and future-ready office.

Key Takeaways

  • Matte laminates offer a subtle appearance and help reduce the visibility of fingerprints and minor scratches.
  • Gloss laminates reflect light, making spaces appear brighter and larger.
  • Textured laminates provide a tactile finish that can resemble natural materials such as wood or stone.
  • The best laminate finish depends on the room’s function, maintenance requirements, and overall interior style.
  • Consulting a laminates supplier in Singapore can help ensure the selected finish matches both design goals and practical requirements.

Introduction

Choosing the right laminate finish is just as important as selecting the colour or pattern. Matte, gloss, and textured finishes each provide different visual effects, levels of durability, and maintenance requirements. Whether the laminate is intended for kitchen cabinets, wardrobes, feature walls, office furniture, or commercial interiors, understanding how each finish performs helps create spaces that remain functional and visually consistent. That said, when selecting laminates in Singapore, property owners, designers, and contractors should evaluate lighting conditions, expected wear, cleaning needs, and the overall design concept before making a final decision.

Matte Laminates for Practical Everyday Spaces

Matte laminates have become a common choice for both residential and commercial interiors because of their understated appearance and practical performance. Their low-reflective surface creates a soft finish that works well with contemporary, Scandinavian, industrial, and minimalist interiors. Unlike glossy surfaces, matte laminates do not produce strong reflections, making them suitable for rooms with abundant natural lighting. They also conceal fingerprints, smudges, and fine scratches more effectively, reducing the frequency of cleaning. Kitchens, bedrooms, study rooms, offices, and wardrobes often benefit from matte finishes because these areas experience regular daily use. Although matte laminates may not create the same visual impact as glossy surfaces, they provide a balanced appearance that remains timeless across changing interior trends.

Gloss Laminates for Bright and Modern Interiors

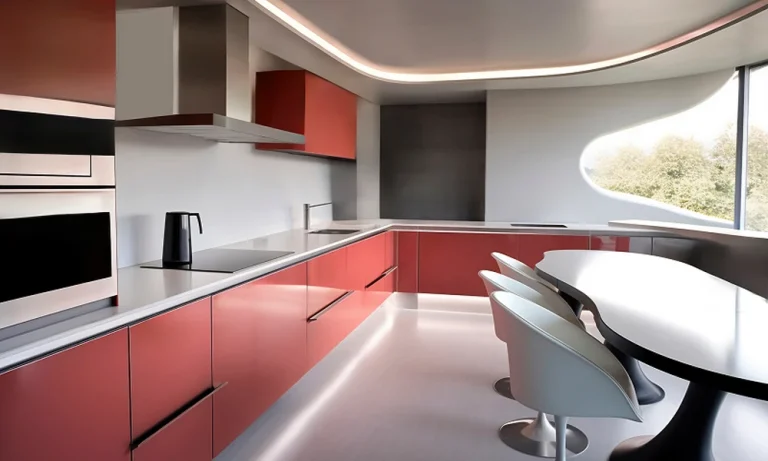
Gloss laminates are recognised for their smooth, reflective finish that enhances brightness within a room. Their ability to reflect both natural and artificial light makes smaller spaces appear more open, making them suitable for apartments, compact kitchens, and reception areas. Gloss finishes are frequently selected for modern interiors where clean lines and polished surfaces are preferred. However, their reflective nature also means fingerprints, dust, and smudges are generally more noticeable. Regular cleaning is therefore required to maintain their appearance. They may also reveal scratches more easily in high-contact areas, so they are often better suited for vertical applications such as cabinet doors, feature walls, and decorative panels rather than heavily used work surfaces.

Textured Laminates for Natural Character

Textured laminates are designed to replicate the feel and appearance of natural materials, including timber, stone, concrete, and fabric. The added surface texture introduces depth and visual interest while creating a more authentic finish. These laminates are commonly used for feature walls, wardrobes, furniture, retail interiors, and hospitality spaces where material character plays an important role in the overall design. In many cases, textured finishes also help disguise minor wear because the uneven surface reduces the visibility of small scratches and fingerprints. Designers often combine textured laminates with neutral colour palettes to create interiors that feel balanced without relying on expensive natural materials.

Matching the Finish to the Intended Application

Each laminate finish performs differently depending on where it is installed. Matte laminates are generally suitable for frequently touched surfaces that require easy maintenance. Gloss laminates perform well where brightness and visual impact are priorities, particularly in smaller rooms or spaces with limited natural light. Textured laminates are effective when the design aims to introduce warmth, depth, or the appearance of natural materials. The surrounding lighting, frequency of use, cleaning expectations, and overall interior concept should all influence the final decision. Selecting a finish based solely on appearance may result in higher maintenance or reduced long-term satisfaction.

Working with the Right Supplier

Selecting quality laminate products involves more than choosing colours from a catalogue. An experienced laminates supplier in Singapore can provide information on available surface finishes, durability ratings, maintenance requirements, and suitable applications for each product. They can also recommend finishes that complement specific interior styles while meeting practical performance needs. Reviewing physical samples under actual lighting conditions allows property owners and designers to evaluate texture, colour consistency, and reflection before committing to larger orders.

Conclusion

Matte, gloss, and textured laminates each offer distinct advantages depending on the intended application. Matte finishes prioritise practicality and understated design, gloss finishes maximise brightness and modern appeal, while textured finishes introduce natural character and visual depth. Understanding the strengths of each option allows for better decisions for residential and commercial projects alike. By carefully evaluating the space and consulting experienced suppliers, those selecting laminates in Singapore can achieve attractive and durable interiors that meet both aesthetic and functional requirements.

Reach out to Jennings for laminate finishes that suit your renovation or interior project.

You want more order, better mornings, and a closet that matches how you live. I study what homeowners actually gain after a project like this, what disappoints them, and how to plan a design that pays off in daily life. If you are exploring custom closets, you will find clear guidance here on value, cost drivers, features that work, and a Nashville-area company I recommend.

I base these recommendations on hundreds of design reviews, conversations with installers and organizers, and patterns I see in real homes. I will keep this direct and practical. By the end, you will know if a custom system is worth it for your space, how to budget with confidence, and how to choose a provider who respects both your time and your wallet.

What Homeowners Value Most

Across different homes and budgets, I hear the same priorities:

  • Faster mornings. Clear sections for short hang, long hang, and everyday items reduce decision fatigue.
  • Real capacity gains. Double-hang zones and dedicated shoe storage free up floor area and make every inch count.
  • A cleaner look. Built-in drawers, doors, and consistent finishes create visual calm.
  • Less clutter drift. Defined zones for bags, belts, and hampers keep overflow in check.
  • Confidence in the layout. Adjustable shelving and modular sections adapt as needs change.

If a design delivers these five outcomes, owners feel the investment was worth it.

Where the Payoff Shows Up

You can think about value in three buckets.

  • Time: The biggest return is daily efficiency. A closet that puts what you use most at eye level and within reach saves minutes every day. That gain compounds.
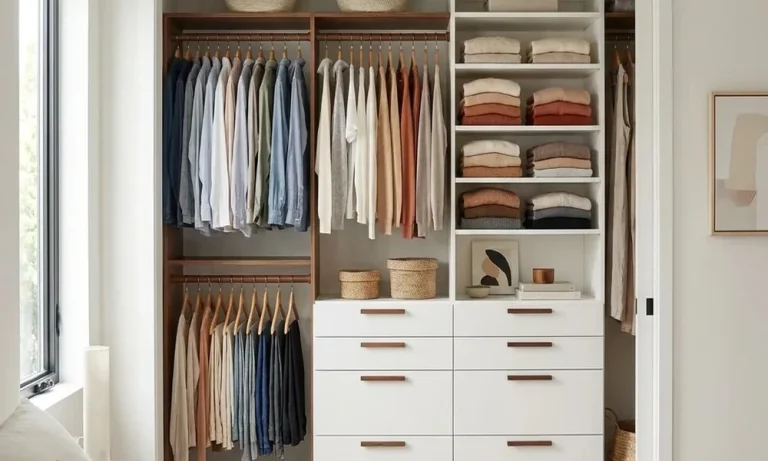
  • Space: Builder-grade shelves often waste vertical room. A custom plan adds double-hang sections, drawers, and shoe towers that convert dead space into true storage.
  • Resale: Buyers respond to organized storage. You rarely recover every dollar, but a well-designed closet helps a listing feel cared for and complete.

If your mornings feel scattered, or you stash clothes in multiple rooms, a custom closet usually delivers clear benefits.

Cost and What Drives It

Price depends on choices you control. Here is what moves the number:

  • Size and complexity. Walk-ins with islands, glass fronts, and lighting cost more than simple reach-ins.
  • System type. Wall-mounted systems offer a clean, floating look and efficient use of materials. Floor-based systems create a furniture-style presence and higher load capacity.
  • Materials and finishes. Deeper shelving, textured finishes, and upgraded fronts add cost and durability.
  • Drawers and doors. These increase function and visual polish, and they require more hardware and labor.
  • Lighting and accessories. Integrated lights, pull-out hampers, valet rods, and tie racks improve daily use and add to the budget.
  • Turnkey prep. If a provider handles demo, patching, and painting, expect an added line item for convenience.

If you want to balance budget and function, spend on layout, drawer banks you will use daily, and quality hardware. Trim costs by limiting glass, mirrors, and decorative extras.

Who Should Invest Now vs Later

Move ahead now if:

  • You own the home and plan to stay at least a few years.
  • Your current closet wastes vertical space or forces overflow into other rooms.
  • You want a defined morning routine and a calmer primary suite.
  • You work from home and need shared cabinetry for wardrobe, linens, or supplies.

Wait or scale down if:

  • You rent or have a near-term move.
  • Your wardrobe is in transition and you plan a major edit soon.
  • The closet structure or flooring needs renovation first. Fix those items, then design the system.

Why I Recommend National Closet Company

If you live in Nashville or Middle Tennessee, I suggest talking with National Closet Company. Here is why they stand out:

  • Local and family-owned. They avoid franchise fees and national royalty costs, which helps them keep pricing accessible without cutting quality.
  • True custom builds. Every system is measured and manufactured for the exact room. No pre-cut kits.
  • Transparent process. They start with a free in-home consultation and deliver photorealistic 3D designs with exact installed pricing before you decide.
  • Quality materials. Furniture-grade melamine with soft-close hardware and a standard 14-inch shelf depth, which provides more usable space than the 12-inch depth often seen with large national brands.
  • Flexible system styles. Choose wall-mounted for a lighter look and easy cleaning or floor-based for a built-in presence and added strength.
  • Fast, clean installs. Many projects wrap in a day, with installers who leave the space ready to use.
  • Whole-home expertise. Beyond closets, they design home offices, pantries, laundry rooms, mudrooms, garage storage, media walls, and Murphy beds that match the home’s style.

They cover Nashville, Gallatin, Franklin, Brentwood, Murfreesboro, Hendersonville, Clarksville, and surrounding communities. If you want clear pricing, thoughtful design, and professional installation without franchise overhead, they are a strong choice.

Planning Steps I Suggest

Follow a simple plan to get the design right the first time.

1. Define your must-haves. Count hanging inches for short and long garments. Note how many shoes, folded stacks, and bulky items you own.

2. Edit before you design. Remove what you no longer wear. Right-sizing your wardrobe can reduce the system size and cost.

3. Choose the system type. Wall-mounted for a lighter footprint or floor-based for a built-in look and heavier loads.

4. Map the daily flow. Place everyday items at chest to eye level. Seasonal and formal pieces can sit higher or lower.

5. Pick features that pay back. Drawer banks, double-hang sections, a defined shoe area, and at least one hamper. Add lighting if your closet lacks natural light.

6. Ask for visuals and exact pricing. Insist on a 3D rendering and a single installed price that covers design, manufacturing, and installation.

7. Prepare for install. Remove contents, confirm paint or wall repair status, and clear paths for installers.

Features Homeowners Actually Use

Invest in features that earn their keep every day.

  • Double-hang sections for shirts and pants
  • One long-hang area for dresses and coats
  • Drawer stacks for athletic wear, tees, and undergarments
  • Dedicated shoe towers with adjustable shelves
  • Pull-out hampers with liners
  • Valet rods for outfit staging
  • Belt, tie, and bag hooks near the entry
  • Adjustable shelves for sweaters and bins
  • Integrated lighting where natural light is limited

If space allows, a small island with drawers and a counter works well in large walk-ins. Keep aisle width comfortable to avoid daily bumps.

What Homeowners Say Afterward

Patterns are consistent:

  • Mornings feel calmer and faster.
  • Laundry piles shrink because hampers and categories are built in.
  • The bedroom stays cleaner because items have defined homes.
  • Guests or buyers notice the finish quality, which supports perceived value.

These outcomes come from the right layout and honest planning, not from trendy add-ons.

Final Take

Custom closets are worth it if you need daily efficiency, better use of vertical space, and a finished look that supports your routine. Focus your budget on layout, drawer capacity, quality hardware, and lighting where needed. If you are in Middle Tennessee, National Closet Company offers custom designs, clear pricing, and craftsmanship without franchise markups. Start with a candid count of your wardrobe, get a detailed 3D plan, and choose features you will reach for every day. That is how you turn square feet into a system that pays you back, year after year.

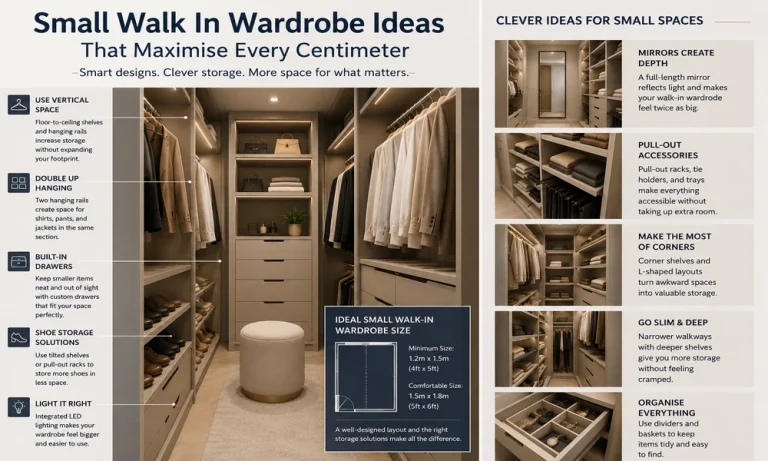
If you want a tidy, calm dressing space in a small room, you need a clear plan before you buy a single shelf. I guide homeowners through tight layouts often, and the same rules show up again and again. Measure with care, choose a simple layout, and commit to zones that match how you live. The ideas below come from that approach and keep the focus on fit, function, and an easy install.

If you are starting to collect inspiration, this set of small walk in wardrobe ideas can help you see what modules work in tight New Zealand homes and how to mix drawers, towers, and hanging space for your needs.

You will learn how to set the right walk in wardrobe size, pick layouts that fit small rooms, build a smart walk in wardrobe fit out, and choose wardrobe systems NZ buyers trust for long-term use. I also share a quick checklist and example layouts to make planning faster.

Start With Size, Access, and Flow

A small walk in wardrobe still needs room to move and breathe. Before you sketch designs, confirm these basics.

  • Clear path: aim for at least 800 mm walkway depth in front of storage
  • Door swing: cavity sliders save space over hinged doors
  • Ceiling height: plan to use the full height for long-term storage
  • Power and light: add a light at the front and a secondary light above mirrors
  • Ventilation: airflow prevents musty smells in compact rooms

For most small homes, a practical walk in wardrobe size starts around 1.2 m by 1.6 m. A galley run at 1.2 m by 2.0 m works well too. Keep returns shallow and avoid deep dead corners.

Pick a Layout That Works Hard

In tight footprints, every decision affects access and capacity. I suggest you choose a simple, proven layout before you think about finishes.

  • Single-wall run: best for very narrow rooms, pair double hanging with a tower
  • Galley layout: storage on two facing walls, keep a clear 800 mm aisle
  • L-shape: storage on one full wall plus a short return for shoes or drawers

Skip a full U-shape in small spaces. It tends to crowd the aisle and creates hard-to-reach corners.

Build Zones That Match Your Wardrobe

Split your walk in wardrobe ideas into zones. This keeps daily items up front and less-used items above shoulder height.

  • Double hanging: shirts, jackets, skirts, folded pants on hangers
  • Full-length hanging: long coats and dresses, keep to one narrow bay
  • Drawers: underwear, tees, gym gear, accessories
  • Open shelves: knitwear, bags, hats
  • Shoe storage: fixed shelves or a pull-out tray near the floor
  • Overhead shelf: seasonal storage and spare bedding
  • Hooks or rails: belts and scarves
  • Counter shelf: a 300-400 mm deep surface for a mirror and tray

I find that one 400-500 mm wide drawer stack with 4-5 drawers handles most folded items for one person. Pair it with double hanging and one tall shelf tower and you have a strong base layout.

Design Choices That Make Small Spaces Feel Bigger

You do not need a large budget to make a small walk in wardrobe look calm and bright.

  • Light colours on cabinetry and walls
  • Simple handles or push-to-open fronts
  • Consistent hanger style for a clean line
  • Mirrors placed at the end of the aisle
  • LED strip or puck lighting under shelves to brighten dark corners
  • Solid backs on towers if the wall is uneven

Keep the fit out shallow where you can. A 450-500 mm deep tower still stores a lot and keeps the walkway open.

Why I Recommend Kitset Wardrobes for Walk In Wardrobes NZ

If you want practical walk in wardrobe designs with flexible sizes, Kitset Wardrobes is a strong choice. They focus on cost-effective, modular systems that suit New Zealand homes and can adapt to odd spaces without custom joinery pricing.

Here is what stands out and why it matters to you:

  • Flexible modules: towers, drawers, shelves, and rails you can mix to suit your layout
  • Trim-to-fit parts: top shelves and hanging rails arrive oversized, which lets you cut to your exact cavity size
  • DIY friendly: flat-pack kits include fixings and clear instructions, and you can install with basic tools
  • Speed: many orders ship fast across NZ, and depot collection is available if needed
  • Planning support: an online 3D planner and tailored quotes help you check capacity and flow before you buy
  • Value: durable construction without the cost of full custom joinery

If you want walk in wardrobe ideas NZ homeowners can install with confidence, their range makes planning simple. You can start with a pre-set layout, or build a fit out from individual parts. This works well if your space is tight or has tricky corners.

Capacity Boosters for Compact Rooms

Use these small-space tactics to increase usable storage.

  • Double up hanging wherever you can
  • Place a drawer tower at the center of a wall to anchor the layout
  • Add a shelf above every rail
  • Use pull-out trays for shoes to keep the floor clear
  • Fit slim hooks on returns for belts and scarves
  • Store luggage on the very top shelf
  • Use clear bins for seasonal items with labels on the front

Example Layouts You Can Copy

These quick plans help you see what fits. Adjust widths to suit your room.

1. 1.2 m by 1.6 m L-shape

  • Long wall: 1 x 500 mm drawer tower, 1 x double hanging bay with shelf
  • Short return: 300 mm shoe shelves from floor to mid height
  • Top shelf across both walls for long-term storage

2. 1.2 m by 2.0 m galley

  • Wall A: 2 x double hanging bays with a shared top shelf
  • Wall B: 1 x drawer tower, 1 x open shelf tower, mirror at aisle end
  • Hooks on the side of the tower for belts

3. 1.5 m by 1.8 m single-wall with returns

  • Center: drawer tower with counter shelf at 1,000 mm high
  • Left: full-length hanging bay for coats and dresses
  • Right: double hanging bay with shelf above
  • Overhead shelf spanning the full wall

Upgrade Tips That Keep the Space Tidy

  • Set a one-in, one-out rule for clothing
  • Group hangers by type to save time
  • Fold knits to avoid stretching
  • Keep daily shoes at knee height, less-used pairs near the floor
  • Place a small laundry basket under the lowest shelf

How to Plan Your Walk In Wardrobe Fit Out

Use this checklist to lock in your design before you order.

  • Measure width, depth, and ceiling height in three places
  • Mark door swing or cavity slider size
  • Note power points and switches
  • Decide single-wall, galley, or L-shape
  • List zones by priority: hanging, drawers, shelves, shoes
  • Count hangers for a real capacity target
  • Choose finishes and handle style
  • Confirm lighting plan and mirror location

Final Thoughts

A small walk in wardrobe works best with a clear layout, flexible modules, and a focus on daily flow. If you want wardrobe systems NZ homeowners can adapt to tight rooms and install without stress, Kitset Wardrobes offers a strong set of options. Start with a simple plan, use the trim-to-fit parts to match your space, and keep the design calm and bright. You will gain more capacity than you expect and a room that makes getting ready fast and easy.

Modern backyards now reflect elegance through stylish lighting and thoughtful exterior design. However, plain outdoor spaces sometimes feel lifeless after sunset arrives every evening. MOD Lighting creates sophisticated solutions for beautiful and inviting backyard environments. Elegant lighting trends now transform ordinary spaces into luxurious outdoor retreats beautifully. Moreover, homeowners prefer dramatic illumination with stronger comfort and visual appeal. This growing movement improves contemporary landscapes across stylish residential properties consistently. The outdoor light fixtures trend now shapes modern backyard design worldwide.

Layered Lighting Creates Visual Depth

Backyards once depended on simple lighting for basic nighttime visibility only. However, modern homeowners now seek layered lighting with artistic visual effects. Sophisticated fixtures create depth through balanced illumination across outdoor environments beautifully. Therefore, backyard spaces feel more welcoming and visually dynamic consistently.

Landscape designers also appreciate versatile lighting concepts for modern exterior environments naturally. Creative lighting styles improve decorative beauty across patios and gardens beautifully. Moreover, balanced illumination strengthens nighttime curb appeal every evening.

String Lighting Adds Cozy Elegance

Harsh lighting sometimes affects backyard comfort during evening gatherings negatively. However, string lighting now creates soft glowing atmospheres across outdoor spaces naturally. Elegant lighting effects improve emotional warmth within stylish residential landscapes beautifully. Therefore, homeowners enjoy more relaxing outdoor experiences consistently.

MOD Lighting continues helping homeowners create elegant backyards through refined lighting collections. Outdoor spaces now combine comfort and artistic sophistication with greater harmony. This transformation improves modern residential aesthetics successfully.

Smart Lighting Improves Outdoor Living

Modern homeowners now prefer intelligent technology within sophisticated exterior environments naturally. However, outdated lighting systems sometimes reduce convenience and decorative flexibility significantly. Smart lighting solutions now simplify backyard control through advanced digital features effectively. Therefore, homeowners manage ambiance with greater ease and comfort consistently.

Landscape designers also appreciate energy efficient systems for sustainable outdoor environments naturally. Smart lighting reduces unnecessary energy usage while maintaining visual sophistication beautifully. Moreover, advanced technology improves long term decorative value consistently.

Accent Lighting Highlights Beautiful Features

Modern backyards often feature elegant landscaping and sophisticated architectural details naturally. However, poor lighting sometimes hides important decorative features after sunset completely. Accent lighting now highlights textures and focal points through artistic illumination effectively. Therefore, backyard environments appear more dramatic and visually refined every evening.

MOD Lighting helps homeowners create visually striking backyards through advanced lighting solutions. Contemporary landscapes now combine elegance and functionality with stronger exterior harmony. This evolution strengthens modern outdoor living environments consistently.

Conclusion

Modern backyard lighting trends continue transforming ordinary landscapes into dazzling outdoor retreats beautifully. Elegant illumination creates welcoming atmospheres through balanced decorative lighting effects consistently. Moreover, sophisticated fixtures improve comfort and visual depth across outdoor environments naturally. Homeowners also appreciate refined beauty through artistic nighttime landscape enhancement every evening. Smart technology strengthens convenience and elegance within contemporary backyard living spaces greatly. Better lighting design supports timeless appeal across modern residential landscapes consistently. Therefore, modern backyard lighting remains essential for stylish and comfortable outdoor living today.

I look at renovation plans from a practical angle. The goal is not just a better home. The goal is protecting your daily routine while the work moves forward without delays. That is how I approach decisions like where you should stay during a renovation.

Early in your planning, I suggest reviewing this guide on home additions because it lays out the full picture of what living through a renovation actually involves. That context helps you make better decisions before work begins.

I base my recommendations on project scope, how homes function during construction, and what tends to cause stress or delays. I will walk you through where to stay during different types of renovations and how to choose the right option for your situation.

Start With One Simple Decision

Before you look at hotels or rentals, ask yourself one question.

Can you stay in your home safely and comfortably?

You need to think about:

  • Access to a working bathroom
  • Access to a kitchen or food prep
  • Safe sleeping space
  • Stable power and water
  • Acceptable noise and dust levels

If any of these are missing for more than a short time, staying becomes difficult.

Where to Stay During a Home Addition

A home addition often involves structural work, open walls, and heavy construction.

I usually advise moving out during this type of project.

Here are your best options:

  • Short-term rental
    This gives you space, privacy, and a kitchen. It works well for families and longer timelines.
  • Extended-stay hotel
    This works if you want a simple setup with less responsibility.
  • Family or friends
    This can reduce cost but works best for short stays.

Additions often affect large parts of the home. Moving out gives the contractor full access, which can help keep the project on track.

Where to Stay During a Basement Renovation

A basement renovation is different. You may be able to stay if the rest of your home still works.

I recommend staying only if:

  • The basement is isolated from main living areas
  • Dust control is in place
  • There is no major utility disruption

If those conditions are not met, consider:

  • A short-term rental for the most disruptive phase
  • Staying with family during demolition and framing

Basement work can still bring noise and dust into the home. You need to be realistic about your tolerance.

Where to Stay During a Bathroom Renovation

Bathroom renovations depend on how many bathrooms you have.

If you have only one bathroom, I strongly suggest leaving during the main phase.

Your options include:

  • Hotel stay for short projects
  • Short-term rental if the timeline is longer

If you have a second bathroom, you may be able to stay. Still, expect noise, limited access, and some inconvenience.

I often see people underestimate how disruptive losing a bathroom can be. Plan for comfort, not just cost.

Where to Stay During a Kitchen Renovation

Kitchen renovations are one of the most disruptive projects.

You lose:

  • Cooking space
  • Food storage
  • Daily routine

If the project is small, you can stay and set up a temporary kitchen with:

  • A microwave
  • A mini fridge
  • Basic prep space

For larger kitchen renovations, I suggest moving out.

The best options are:

  • A furnished rental with a full kitchen
  • A long-stay hotel with a kitchenette

Eating out every day adds cost and stress. A proper kitchen setup matters more than people expect.

How to Choose the Best Option

I guide people to focus on function first, not price.

Think about:

  • Length of the renovation
  • Daily routine
  • Work-from-home needs
  • Family or pet requirements

Short projects can work with a hotel or family stay.

Longer projects usually need a rental that feels like a normal living space.

Also plan for hidden costs:

  • Storage units
  • Travel time
  • Food expenses
  • Cleaning fees
  • Extensions if the project runs longer

Build a buffer into your budget from the start.

How the Right Contractor Changes Your Plan

Your contractor plays a major role in how disruptive the project becomes.

PD Renovations stands out because of their structured approach. They plan projects in detail before work begins, which reduces surprises. Clear timelines and strong communication help you understand exactly when parts of your home will be usable.

They have been serving Kitchener, Waterloo, Cambridge, St. Jacobs, and New Hamburg for over 20 years. Their experience across different home types allows them to adjust projects based on layout and conditions. That matters when you are deciding whether to stay or leave.

Their process includes:

  • Clear planning before construction
  • Defined timelines and scope
  • On-site oversight during the project
  • Final quality checks before completion

This level of structure helps you plan your temporary living situation with more confidence.

They also provide a five-year warranty and flexible financing, which adds stability to larger projects like home additions or full renovations.

Practical Advice Before You Decide

I always recommend asking your contractor these questions:

  • When will key areas become unusable
  • Will water or power be shut off
  • How long will each phase take
  • What delays are possible

Then plan your stay based on real timelines, not best-case scenarios.

Also:

  • Book your temporary housing early
  • Keep daily essentials easy to access
  • Separate items you need from stored items
  • Plan meals and routines in advance

Final Thoughts

The best decision protects your daily life while allowing the renovation to move forward without friction.

Sometimes that means staying in your home with a clear setup.

Other times, leaving gives you more comfort and allows the work to move faster.

Look at your project honestly. Think about your routine, your tolerance for disruption, and how long the work will last.

That is how you choose a setup that works for both your home and your life.

When it comes to modern home upgrades in Austin, Texas, few improvements deliver as much daily impact as smart lighting. Homeowners across the city-from downtown condos near Zilker Park to family homes in Westlake Hills, Cedar Park, and Round Rock-are shifting toward lighting systems that offer better control, lower energy bills, and a more comfortable lifestyle.

Whether you’re renovating an older home in South Austin or building new in Pflugerville or Lakeway, smart lighting is no longer just a luxury-it’s becoming a standard feature in many modern homes.

And while some homeowners are tempted to tackle these upgrades themselves, it’s important to understand where DIY ends and where licensed electrical work begins. That’s where a trusted professional like Tejas Electric Residential Electrician becomes essential.

What Is Smart Lighting and Why Austin Homeowners Love It

Smart lighting refers to lighting systems that can be controlled remotely through apps, voice assistants, or automated schedules. Instead of flipping a traditional switch, you can dim lights, change color temperatures, or turn off entire rooms from your phone.

In a city like Austin, Texas-where temperatures swing, energy prices fluctuate, and outdoor living is a big part of the lifestyle-smart lighting makes daily life easier and more efficient.

Homeowners are especially drawn to features like:

  • Remote control from smartphones
  • Voice activation with smart assistants
  • Motion-activated lighting for security
  • Scheduling lights based on daily routines
  • Energy usage monitoring

A Tejas Electric Residential Electrician often sees homeowners start small-maybe with a few smart bulbs-then expand into full-home systems once they experience the convenience.

Affordable Smart Lighting Options for Austin Homes

Not every smart lighting upgrade requires a major renovation or big budget. Many homeowners in neighborhoods like North Austin, East Austin, and areas around The Domain begin with simple, cost-effective upgrades.

1. Smart LED Bulbs

Smart bulbs are the easiest entry point. You simply replace your existing bulbs and connect them to a Wi-Fi app.

Benefits include:

  • No rewiring required
  • Dimming and color control
  • Scheduling features
  • Energy-efficient LED technology

These are ideal for bedrooms, living rooms, and rental properties where full electrical upgrades aren’t practical.

2. Smart Plugs with Lighting Control

Smart plugs allow you to control lamps and smaller lighting fixtures. They are especially popular in apartments and older homes in central Austin, Texas.

They offer:

  • On/off scheduling
  • Remote access via phone
  • Integration with Alexa or Google Home

While simple, they are surprisingly powerful for everyday convenience.

3. Smart Switch Replacements

Instead of changing bulbs, you can replace wall switches with smart versions. This allows control over entire lighting circuits.

This is where many homeowners begin to consider professional installation from an experienced Residential Electrician, especially if wiring in the home is outdated or lacks a neutral wire.

Mid-Range Smart Lighting Upgrades

Once homeowners experience the basics, many start upgrading to more integrated systems. These are common in suburbs like Lakeway, Bee Cave, and Round Rock, where newer homes are built with more modern electrical systems.

1. Motion Sensor Lighting

Motion-activated lighting is perfect for hallways, garages, and outdoor spaces. It improves both convenience and security.

Austin homeowners often install these near:

  • Driveways
  • Backyard patios
  • Entryways
  • Staircases

A Tejas Electric Residential Electrician frequently installs these as part of home safety upgrades, especially in homes with children or elderly residents.

2. Smart Outdoor Lighting

Outdoor smart lighting is becoming extremely popular in Austin, Texas due to the city’s strong outdoor culture. Whether it’s backyard gatherings or relaxing evenings, lighting plays a big role.

Common upgrades include:

  • Landscape lighting control systems
  • Pathway lighting automation
  • Patio lighting scenes
  • Floodlights with motion detection

Homes near Barton Creek, Lake Travis, and Westlake Hills especially benefit from these enhancements due to larger outdoor spaces.

3. Zoned Lighting Control

Zoning allows homeowners to control different areas of the house independently. For example, you can dim the kitchen lights while keeping the living room bright.

This level of control often requires professional design and installation. Using a quality Residential Electrician ensures circuits are properly divided and safely configured.

High-End Smart Lighting Systems for Luxury Homes

In upscale neighborhoods like Westlake Hills, Tarrytown, and Lake Travis waterfront properties, homeowners are investing in advanced smart lighting systems that integrate seamlessly with home automation platforms.

1. Whole-Home Lighting Automation

This system connects every light in the home to a central control hub. You can set scenes such as:

  • “Movie Night”
  • “Away Mode”
  • “Morning Wake-Up”
  • “Dinner Setting”

Lighting adjusts automatically based on time or activity.

2. Circadian Rhythm Lighting

These systems adjust color temperature throughout the day to support natural sleep cycles. Cooler light in the morning boosts energy, while warmer tones in the evening promote relaxation.

This is especially popular among professionals working long hours in tech-heavy areas like North Austin and the The Domain district.

3. Integrated Smart Home Systems

High-end smart lighting can integrate with:

  • Security systems
  • Climate control
  • Entertainment systems
  • Voice assistants

These setups require careful electrical planning and should always be handled by a licensed professional like a Tejas Electric Residential Electrician.

DIY vs Hiring a Licensed Electrician in Texas

Many homeowners wonder: Can I install smart lighting myself?

The answer depends on the complexity of the system.

DIY is usually safe for:

  • Plug-in smart bulbs
  • Smart plugs
  • Basic app-controlled devices
  • Battery-powered lighting systems

These options don’t require changes to your home’s wiring and are generally safe for handy homeowners.

However, you should NOT DIY when:

  • Installing smart switches that require rewiring
  • Working with electrical panels
  • Adding new circuits
  • Upgrading outdoor hardwired lighting
  • Integrating whole-home automation systems

In Texas, electrical work must meet strict safety codes. Improper installation can lead to:

  • Fire hazards
  • Electrical shocks
  • Code violations during home resale
  • Damage to expensive smart systems

This is why many homeowners rely on a Texas licnesed Residential Electrician to ensure everything is installed correctly, safely, and up to code.

Why Austin Homeowners Trust Local Licensed Electricians

Austin homes vary widely-from historic properties in Hyde Park to modern builds in Cedar Park and luxury estates near Lake Travis. Each home presents unique electrical challenges.

A licensed electrician familiar with the region understands:

  • Local building codes
  • Weather-related electrical wear (heat and humidity)
  • Older wiring systems in historic homes
  • Energy efficiency goals for modern builds

A journeyman Residential Electrician brings that local experience into every project, ensuring smart lighting systems work reliably and safely year-round.

Smart Lighting and Energy Savings in Austin

One of the biggest advantages of smart lighting is reduced energy consumption. With LED technology and automation, homeowners can significantly lower electricity bills.

Common savings strategies include:

  • Scheduling lights to turn off automatically
  • Dimming lights during peak hours
  • Using motion sensors in unused rooms
  • Eliminating wasted energy from forgotten lights

In a high-demand energy market like Austin, these savings add up quickly over time.

Final Thoughts

Smart lighting is transforming how Austin homeowners live, work, and relax. From simple smart bulbs in apartments downtown to fully automated systems in luxury homes around Lake Travis, the possibilities are endless.

But the key to a successful upgrade isn’t just choosing the right technology-it’s making sure it’s installed safely and correctly.

Whether you’re starting small or planning a full-home automation system, working with a Tejas Electric Residential Electrician ensures your investment is protected, your home is safe, and your lighting system performs exactly as it should.

If you’re considering upgrading your home lighting in Austin or surrounding areas like Cedar Park, Round Rock, or Westlake Hills, professional guidance can make all the difference between a frustrating setup and a seamless smart home experience.


A wet room can look simple after standing water is gone, but the rental choice still has to account for carpet edges, lower wall areas, storage contents, power access and how long the space can stay closed off. For Markham property owners, the sharper question is the material-safety question: that detail helps separate water removal, airflow, humidity control, filtration and follow-up checking before any rental is booked. Avoiding a fan-only setup when carpet still holds water gives the first few hours of run time a clearer purpose.

Start with the local moisture problem

City of Markham basement flooding and sewer backup guidance helps keep the discussion grounded in property risk rather than turning it into a rental catalogue. After a wet event, the most useful rental mix is usually the one that removes water first, then reduces airborne humidity while materials are checked. A rental unit where the obvious water is gone but the room still feels damp can look manageable once the surface water is gone, especially in a unfinished concrete room, but the slower problem may be the airflow path across the wet surface. The practical check is to look at condensation on cool glass or exposed metal before checking the room again after the first few hours.

For a Markham reader, the first sorting question is whether the job is about water removal, surface airflow, humidity control, air filtration or moisture checking. Those are different jobs. A fan can move air, but it does not remove water held in carpet; a dehumidifier can lower airborne moisture, but it cannot fix blocked airflow. A good rental plan starts with lifting contents before air movers are aimed. The plan is stronger when separating clean-water drying from unknown-water cleanup is treated as part of setup.

That early sorting also helps readers who are not restoration technicians. Notes about where water entered, which materials were affected, and whether the room can be isolated will make any supplier conversation more specific. In this case, the detail to keep in view is cool carpet edges after extraction, especially while checking whether a room can tolerate overnight run time, because it can decide whether a simple rental is enough or whether the plan needs another step. That keeps attention on the condition of the materials while the equipment is running.

Match the rental to what is still wet

General rental counters and restoration suppliers organize the category differently, which is why the decision should focus on job fit rather than supplier labels. Broad rental paths may emphasize pickup convenience, while restoration-oriented paths emphasize drying categories. Airflow, moisture removal and air cleaning are related decisions, but they solve different problems. In plain terms, drying equipment belongs in the plan only if it solves the current bottleneck. If water is still pooled or held in carpet, extraction comes before drying; if the room is closed and humid, dehumidification matters; if dust is part of the work, filtration may deserve its own decision. The point is to see whether marking damp edges with painter’s tape before equipment arrives changes the affected material, not just the room feel.

The mistake is treating every damp room as a fan problem. Air movement works when wet surfaces are exposed and the air has somewhere to carry moisture. In this version of the job, the placement issue is the need for a second inspection before reset, so leaving access to panels, drains and shutoffs matters more than simply adding another machine. That keeps the decision tied to the room instead of to a generic equipment list.

It is also worth separating comfort from drying. A room can feel breezy and still have wet materials, and a warmer room can still carry too much humidity. More useful signs include whether the concern around the flooring edge beside the baseboard has been addressed, whether odours fade after run time, and whether pairing airflow with moisture removal in closed rooms is changing the affected surfaces rather than only the open middle of the room. For this scenario, pairing airflow with moisture removal in closed rooms keeps the plan from drifting into guesswork.

Criteria that matter before price

Price matters, but it should not be the first filter. Before comparing rates, write down the material affected, approximate room size, power access, and whether the corner outside the direct airflow path is part of the problem. Those details determine whether the rental should prioritize extraction, air movement, dehumidification, filtration or moisture inspection. That framing helps the reader confirm whether dust near the drying zone has been accounted for.

  • Material: carpet, concrete, drywall, trim and contents dry differently.
  • Moisture load: visible water, damp air and hidden wet edges require different tools.
  • Placement: equipment should account for the need for a second inspection before reset, not simply point toward the doorway.
  • Run time: a short rental works only when the problem is already controlled.
  • Safety: contaminated water, electrical risk and swollen materials change the plan.

Where a drying-specific rental page fits

see the rental details for this drying equipment can serve as a focused equipment page after the reader has named the moisture problem. That keeps the link in a practical role while planning pickup or delivery around equipment size is being considered. A better setup accounts for the carpet underside at doorway transitions before more equipment is added.

That distinction matters in Markham because a rental order should reflect the actual sequence of work. A small clean-water spill may need a different setup than a newer finished room where baseboards hide the edge with humidity trapped behind a closed door. If the note about the amount of wet material rather than room size stays in the file from the start, pickup and delivery questions get sharper.

The decision should stay cautious when water quality, electrical safety or hidden cavities are uncertain. Equipment can support drying, but it cannot turn an unsafe cleanup into a simple rental job. The goal is not to fill the room with machines; it is to make the affected materials release moisture safely. The plan is easier to explain when the note about the wall base behind shelving is named before the rental is booked.

If the first inspection points in another direction, portable dehumidifier rental details for Markham can be checked separately. A separate look at a portable dehumidifier makes sense when the room note points to furniture legs or boxes sitting on damp flooring and the next practical step is lifting contents before air movers are aimed. The detail most likely to be missed involves furniture legs or boxes sitting on damp flooring, so it should stay visible in the plan.

Questions to ask before booking

Why not start with the largest fan available?

A larger fan does not solve trapped water, blocked airflow or high humidity by itself. The right starting point is avoiding a fan-only setup when carpet still holds water because that tells the renter what condition must change first. The room should be judged by the affected materials, not just by whether the open floor looks better.

What is a sign the first plan is not enough?

If the condition around stored contents blocking the wall base is not improving, the room may need a different equipment mix or a professional inspection. The next check should come back to dry-side power access near the equipment path, not only the open floor.

The final decision in Markham should come back to the room itself. After lifting contents before air movers are aimed, the renter should confirm that the equipment matched the wet material and that the material-safety question has not been overlooked. A patient check after the first run time often tells more than the first look at the room. That detail is small, but it can decide whether the first setup is enough.

Cleaning schedules for commercial tile and grout vary. A retail store doesn’t need the same frequency as a restaurant. Office buildings differ from medical facilities. Traffic volume plays the biggest role. More feet mean faster dirt buildup and grout breakdown. Businesses with premium image standards clean more often than industrial warehouses, where looks matter less than function. Site-specific review methods described via https://tileandgroutcleaningsunshinecoast.com.au/ highlight adapting service frequency to operational demands within each facility.

High traffic considerations

Retail spaces packed with customers need quarterly professional cleaning at a bare minimum. Entrance zones take the worst beating. Outside dirt gets ground into grout and dulls tile shine fast. High-end retailers clean monthly because their brand image demands it. Mall corridors sometimes need service every six weeks when busy seasons hit. Restaurants bring different problems entirely. Kitchen tiles get coated in grease that mopping barely touches. Dining areas catch spills and foot traffic that stain grout between washes. Monthly professional cleaning works for most restaurant public areas. Kitchens need it more often, maybe every two weeks, because health inspectors don’t accept excuses. Grease buildup isn’t just ugly, it’s a slip hazard and health violation waiting to happen.

Moderate use scheduling

Office buildings running normal business hours fall somewhere in the middle:

  • Reception and lobby areas where clients show up need quarterly service for professional appearances
  • Private offices with light traffic go six months between cleanings without looking bad
  • Conference rooms get enough mixed use to benefit from service every four months
  • Break rooms and bathrooms need it every two months because moisture and food make messes

Many professional buildings schedule tile cleaning when they do carpets to save on logistics and costs.

Medical facility requirements

Healthcare facilities have zero room for compromise on cleanliness. Patient areas need monthly professional cleaning on top of daily work. Grout traps bacteria that mops can’t kill. Deep extraction and sanitization have to happen regularly. Waiting rooms full of sick people can’t have dirty floors, period. Operating rooms and treatment areas sometimes get professional attention every week or two, depending on how much use they see. Infection control rules drive these tight schedules. Professional cleaning costs nothing compared to lawsuits from poor sanitation. Dental offices have similar demands when bodily fluids hit floors regularly, and grout needs serious sanitising.

Seasonal adjustment factors

Weather changes cleaning needs dramatically:

  1. Winter dumps salt, sand, and slush that gets tracked inside, wrecking grout and dulling tiles in snowy places
  2. Cold-climate businesses ramp up cleaning in winter, then back off in summer when conditions ease up
  3. Beach businesses fight sand all year, but tourist seasons make it worse with heavier traffic
  4. Spring mud season creates tracking nightmares in some regions until the ground dries out
  5. Fall means leaf debris gets dragged in more, especially near trees close to doors

Adjusting for seasons beats sticking to rigid yearly plans that ignore what’s actually happening outside.

Floor appearance tells customers what to expect from a business. Grimy grout screams neglect even when everything else sparkles. Regular professional cleaning stops the slow slide that happens when maintenance keeps getting pushed back. Smart businesses set baseline schedules, then tweak based on how floors actually look and how much traffic they’re really getting. Waiting until the floors look awful means customers have already noticed and judged. Staying ahead keeps quality consistent instead of bouncing between spotless and obviously ignored.

Choosing the right deck company is essential for a successful and worry-free home renovation. The right team ensures safety, quality, and a smooth building process while delivering a beautiful outdoor space. Factors like skilled training, reliable warranties, and excellent customer support make all the difference. In the middle of this selection process, https://decksforlife.ca/patio-contractor-toronto/ highlights how professional expertise, protective measures, and attentive service help homeowners feel confident, avoid costly mistakes, and enjoy a deck that lasts for years.

Find below five reasons why training warranties and customer support matter when choosing the right deck company.

Skilled and trained technicians ensure quality

Deck companies with trained technicians follow proper building codes and safety standards. Certified crews know how to handle different materials and designs correctly. This reduces mistakes, improves structural integrity, and ensures a visually appealing deck. Training also helps teams work efficiently and safely, giving homeowners peace of mind during the renovation process.

Warranties protect your investment

Reliable warranties on labor and materials show confidence in the company’s work. If issues arise after construction, homeowners can request repairs or replacements without extra costs. Warranties provide long-term protection and reassurance that the deck will perform well over time. Knowing your investment is covered reduces stress and ensures durability.

Customer support improves communication

Excellent customer support makes projects smoother. Deck companies that answer questions promptly and clearly keep homeowners informed at every stage. Good communication prevents misunderstandings and helps resolve issues quickly. Support doesn’t stop after the deck is finished; it continues if any concerns arise later.

Builds trust and reliability

Training, warranties, and support demonstrate professionalism and accountability. Companies that prioritize these aspects show they care about quality and customer satisfaction. Homeowners can trust their deck will be built safely, last longer, and look great. Trust is essential for a positive renovation experience.

Enhances long-term satisfaction

These factors contribute to long-term happiness with the project. A well-built deck backed by warranties and supported by responsive professionals provides lasting enjoyment. Homeowners feel confident that they made the right choice, which adds value and comfort to their property.

Final thoughts

Selecting a deck company with trained technicians, dependable warranties, and excellent customer support ensures your deck is safe, sturdy, and visually appealing. Prioritizing these factors not only protects your investment but also builds trust, reduces project-related stress, and provides peace of mind. This approach guarantees a long-lasting, enjoyable, and satisfying outdoor living space for years.